How to make an origami dress out of paper? DIY paper dress Origami dress from paper diagrams
We bring to your attention a master class with a diagram in which we will tell you how to make an origami dress out of paper with your own hands. Step-by-step instructions with photos of step-by-step work will help you do everything right.
Tools and materials Time: 20 minutes Difficulty: 4/10
- double-sided colored paper/scrapbooking paper;
- scissors;
- ruler;
- pencil;
- glue crystals, rhinestones, openwork ribbon and sparkles (for decorations);
- glue or thin tape.
Step-by-step instructions with photos
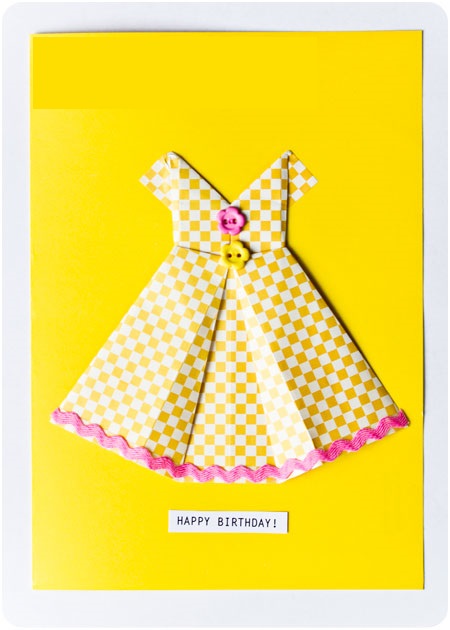
Give your beloved mother or teacher a wonderful postcard on March 8th with a decoration in the form of an origami dress made from paper yourself! Undoubtedly, they will be delighted with such a present!
In addition to the fact that with this dress you can make a stunning handmade card, it can also be used as an element of a garland or a decorative decoration on a gift box. In special cases, using this pattern, you can make an origami dress out of money and present it as such an unusual gift.

If you make this dress from multi-colored scrapbooking paper and additionally decorate it with decorative stones, it will turn out to be truly luxurious!

Step 1: Cut out a square
Take a piece of paper and cut a square out of it. The size of the square in this case does not matter - the larger sheet of paper you take, the larger your dress will be, and accordingly vice versa.
Step 2: Fold the Paper
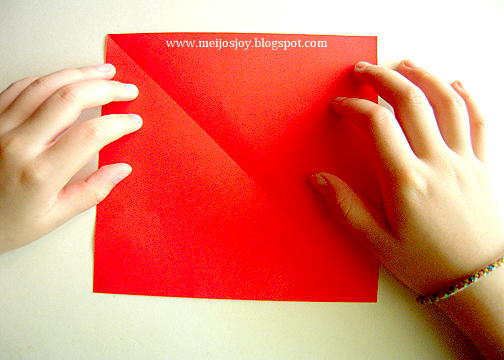
Fold the square in half horizontally. Unfold the paper.

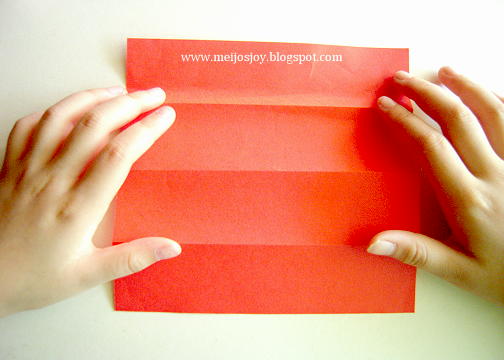
Fold the left edge of the paper to the center line, then fold the right edge to the center line.
Expand. You should end up with a square with three horizontal folds.
Step 3: Create a pleat for the waist
Place the paper in front of you with the folds facing up.
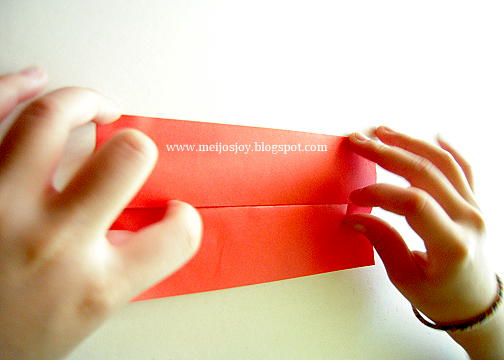
Fold the paper from the leftmost fold to the fold in the middle.

After this, fold the right fold to the fold in the middle. Press the folds with your fingers. This will be the front of the dress.

Count 2-3 centimeters from the top edge and place a dot. Fold the paper in the middle on both sides to this point, forming the waistline of the dress.

Step 4: Make the Skirt
From the point in the middle of the “cross”, pull the fold towards the outer edge. Repeat on the other side.

Step 5: Shape the Collar and Sleeves
At the top of the craft, fold a small corner on the left side from the middle down. Repeat the manipulations on the right side.
We just need a crease, so open the collar back up. Turn the craft over. Pull the folds down from the center on both sides. This way you will create an origami neckline in the dress.

Do the same on the other side.

From the mid-waist line to the top point, wrap the triangle. Do the same on the other side.

Glue the back of the dress together using tape or a small dab of glue.

A traditional gift for March 8th for a mother or grandmother from a child is a handmade postcard. In this article we will teach you how to make origami dresses that you can use to decorate postcards for March 8th. A postcard decorated with an origami paper dress looks original and impressive. To learn how to make an origami dress with your own hands, you need to read the detailed instructions with step-by-step photographs below. It should be admitted that the paper dress craft is quite difficult to make; preschool children will not be able to cope with it. In order to make an origami paper dress with your own hands, you will need a sheet of square-shaped colored paper. It would be good if it was not ordinary paper, but special paper for scrapbooking with an interesting print. Origami dresses made from paper with a floral print look especially impressive. Please note that the paper for a paper dress should be thin enough to be easy to fold, and so that the finished craft from it does not look rough and bulky.

1. So, let's start folding an origami dress out of paper. Take a sheet of square shaped colored paper. 
2. Fold a sheet of paper in half with the colored side facing out.

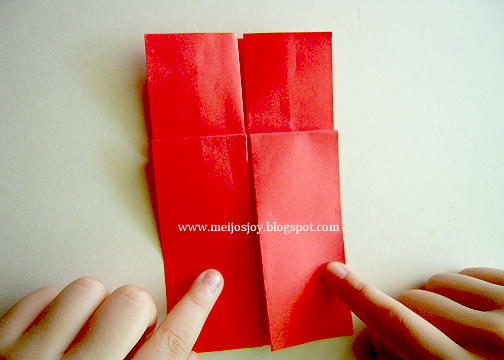
3. Unfold the paper, then fold the sides to the center fold.

4. Unfold the paper again. You should end up with a square divided into 4 equal parts.

5. We continue to fold the origami dress with our own hands. Now, in turn, fold each side fold towards the center fold.

6. This is what you should get as a result.

7. Now bend your origami dress blank in half, stepping back from the top edge a little less than a centimeter.


9. This is what your paper dress template should look like from the back side.

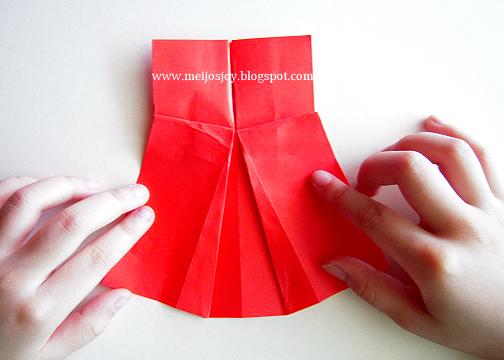
10. Turn it over. Now we will make a skirt for an origami dress from the lower, longer part of the blank.

11. To open the pleats on the paper dress skirt, first pull the right inner corner to the side as far as possible. Hold the fold with your index finger at the top center.

12. Do the same on the other side. Please note that you need to straighten the folds of the origami dress as far as possible.

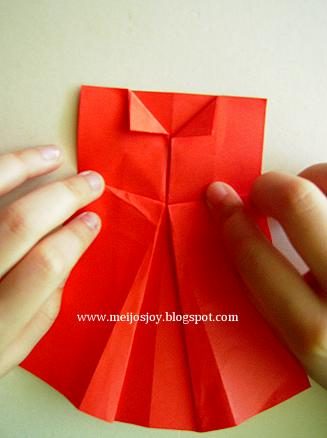
13. Now we begin to design the neckline area. Bend the upper corners at right angles downward as shown in the photo.

14. Now bend back the resulting collar and turn the blank for the future origami dress over to the reverse side. Now is the most difficult moment... Pull back the top layer of the workpiece and at the same time open the “pockets” resulting from the previous step. Straighten and smooth them out.

15. This is what your paper dress blank should look like as a result of all these complex manipulations with paper.

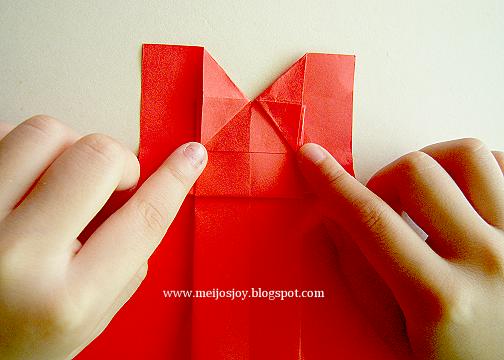
16. Now we bend the sides of the top of the origami dress one by one.

17. Please note that along with the top of the dress, the sides of the skirt will also be folded.

18. Fold the other side. Please note that both the top of the origami dress and the skirt should be hemmed at the same distance. A paper dress should be symmetrical.

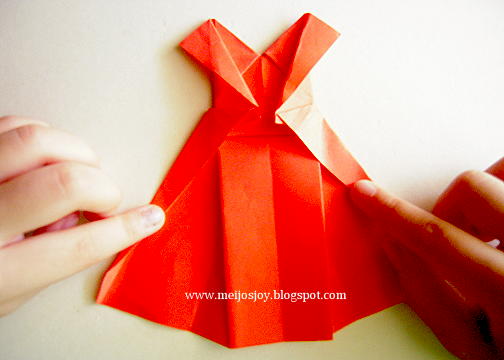
19. All that remains is to make the origami sleeves of the paper dress. To do this, bend the upper corners of the dress on the back side to the maximum. This is what your paper dress should look like from the back side at the end.

20. And this is his front view. You can decorate the dress with rhinestones, sequins, ribbons or decorative braid. After that, all that remains is to glue it onto the greeting card.

On youtube.com you will find a very detailed and accessible origami dress video, albeit in English.
A traditional gift for March 8th for a mother or grandmother from a child is a handmade postcard. In this article we will teach you how to make origami dresses that you can use to decorate postcards for March 8th. A postcard decorated with an origami paper dress looks original and impressive. To learn how to make an origami dress with your own hands, you need to read the detailed instructions with step-by-step photographs below. It should be admitted that the paper dress craft is quite difficult to make; preschool children will not be able to cope with it. In order to make an origami paper dress with your own hands, you will need a sheet of square-shaped colored paper. It would be good if it was not ordinary paper, but special paper for scrapbooking with an interesting print. Origami dresses made from paper with a floral print look especially impressive. Please note that the paper for a paper dress should be thin enough to be easy to fold, and so that the finished craft from it does not look rough and bulky.
1. So, let's start folding an origami dress out of paper. Take a sheet of square shaped colored paper.
2. Fold a sheet of paper in half with the colored side facing out.
3. Unfold the paper, then fold the sides to the center fold.
4. Unfold the paper again. You should end up with a square divided into 4 equal parts.
5. We continue to fold the origami dress with our own hands. Now, in turn, fold each side fold towards the center fold.
6. This is what you should get as a result.
7. Now bend your origami dress blank in half, stepping back from the top edge a little less than a centimeter.
9. This is what your paper dress template should look like from the back side.
10. Turn it over. Now we will make a skirt for an origami dress from the lower, longer part of the blank.
11. To open the pleats on the paper dress skirt, first pull the right inner corner to the side as far as possible. Hold the fold with your index finger at the top center.
12. Do the same on the other side. Please note that you need to straighten the folds of the origami dress as far as possible.
13. Now we begin to design the neckline area. Bend the upper corners at right angles downward as shown in the photo.
14. Now bend back the resulting collar and turn the blank for the future origami dress over to the reverse side. Now is the most difficult moment... Pull back the top layer of the workpiece and at the same time open the “pockets” resulting from the previous step. Straighten and smooth them out.
15. This is what your paper dress blank should look like as a result of all these complex manipulations with paper.
16. Now we bend the sides of the top of the origami dress one by one.
17. Please note that along with the top of the dress, the sides of the skirt will also be folded.
18. Fold the other side. Please note that both the top of the origami dress and the skirt should be hemmed at the same distance. A paper dress should be symmetrical.
19. All that remains is to make the origami sleeves of the paper dress. To do this, bend the upper corners of the dress on the back side to the maximum. This is what your paper dress should look like from the back side at the end.
20. And this is his front view. You can decorate the dress with rhinestones, sequins, ribbons or decorative braid. After that, all that remains is to glue it onto the greeting card.
On youtube.com you will find a very detailed and accessible origami dress video, albeit in English.
Material prepared by: Anna Ponomarenko
Origami dress is one of the most popular paper origami. If you don’t know how to make an origami dress, then on this page you will find everything you need to assemble this simple paper figurine.
In the first photo you can see what you will get if you follow the assembly diagram below. The second photo of the origami dress was taken by one of our site users. He ended up with a dress almost the same as in the diagram. If you have photos of origami you have collected, send them to: This email address is being protected from spambots. You must have JavaScript enabled to view it.

Assembly diagram
Below is a diagram of how to assemble an origami dress from the famous Japanese origami master Fumiaki Shingu. If you strictly follow the instructions, then assembling the origami dress will not take much time, and the result will be the same as in the picture. After doing what is described in the diagram several times, you will understand how to make an origami dress quickly and without looking at the diagram.

Video master class
Assembling an origami dress for beginners may seem like a daunting task. Therefore, we advise you to enter the query “origami dress video” on the largest video hosting site on the Internet, YouTube. There you will find many different videos about the origami dress, which clearly show the steps to assemble the dress. We hope that after watching the video of the assembly master class, you will have no more questions about how to make an origami dress.
This video will also teach you how to make a paper dress:
To strengthen your skills in making an origami dress, watch this video tutorial:
Symbolism
A dress is a symbol of femininity. A white dress is usually a symbol of the bride, but a black dress is the embodiment of fashion and style.
You can create original paper dresses not just as an addition to your favorite toys. The paper is suitable for modeling a fabric dress. Let's talk in more detail about what paper crafts such as various dresses are like.
Making your own paper clothes
A wide variety of associations arise with paper clothes. For most girls, one of the best children's entertainments was dolls made from a sheet of paper, for which they invented and also drew a huge number of outfits.

Now paper dolls are sold with different clothes, which is not so interesting in comparison with creating them with your own hands. We suggest using the existing instructions for creating an outfit and folding an exclusive dress from multi-colored paper, focusing on a technique such as origami. It can be used in an application or an entire composition.


Using a special pattern for assembling multi-colored paper, you can get a simple but quite original dress. A pink tint is suitable for one paper side. Fold a square sheet of paper in half, make folds, and then open it again. Then the paper must be divided into several equal parts, and the existing seams must be folded.

The outer sides should also be folded inward, and the paper should be turned over with the pink side. You should bend the upper part of the resulting rectangle, creating corners on the upper side. Turn the resulting figure over again. Form the corners in the upper part thinner by half, while bending the sides inward, subsequently bending the corners of the lower part diagonally.

Upon completion of the turning, you will be convinced that you will get a beautiful sundress in a pink palette. Many similar origami outfits have been created; their designs are simple and require exceptional accuracy and utmost care.

It is possible that this is connected with the traditional clothing of women from Japan - a kimono, that is, a piece of material that is wrapped in the process of dressing, as if folding an origami figure from the material.


For such clothes, suitable fabric would be either origami paper, simple multi-colored paper, or even newspapers. The font on the newspaper looks like a unique print on clothes. It is not without reason that newspaper decor has been used by designers for many years when decorating things. For certain clothes, newspaper itself becomes the optimal material for developing collections.

What should boys do with dresses?
Paper dresses, as in the photo, are not created for dolls. But for little ones who are interested in scrapbooking, such things can be very useful. They are used to decorate album pages, notebooks, photo frames, and various postcards.

Not a single element can express the iridescence of the mood and romance as successfully as an airy dress. You can actually make it from a sheet of paper, and at the same time make a print so you can apply it yourself.

If you follow the step-by-step process of making an origami dress with your own hands, you can make it the main decorative element, as well as the main detail of a postcard.

Folding a dress like this is not a complicated process that starts with a square. Then it should be divided into four equal parts. After this, divide the resulting figure into two parts, while folding half to the center, and then another. The clothes will have what is called pleating.

Master Class
A doll dress is created in the same way as fabric clothes. However, not every type of paper is suitable for this option. If you like scrapbooking, then you know that the sheets used to decorate the pages are quite durable and also extremely flexible. To learn how to make such a paper outfit, use a simple master class.


For cutting, patterns are used, as for fabric clothes, but they are not sewn, but glued together. Thanks to a variety of techniques, you can create pleated collars and multi-layered luxurious skirts. Original lace for decoration can be purchased at any specialty store.

You can make this type of clothing, delving into the history of creation, put things on dolls from various eras, and also organize true ballroom evenings.

Doll dresses are made not only from paper, they can also be made from bags and plastic bottles. These solutions are especially relevant among avant-garde couturiers.


Directly paper versions provide an opportunity for fashion designers to demonstrate their full talent in design. In addition, this type of dress looks great on the model, since it is folded directly on her, using scissors, as well as the usual adhesive composition, you can use PVA glue.


Photos of paper dresses